
How to become a VFX rotoscopy Rockstar? Know here…
Visual effects in movies are at an all-time high, and rotoscopy has surely become an integral part of the process. It has been used in almost all movies that you must have seen in the last two decades. This may not be easy for everyone to understand, but it can be made easy to understand when you know how this actually works. VFX rotoscopy is probably the very first step for almost all VFX artists who are looking forward to becoming amazing VFX compositors.
Let’s go back a little…

It all started in the US back in the 1915 when Max Fleischer was looking forward to creating an alternative to all those expensive and time-consuming processes of hand-inking and painting cells. When we talk about the early rotoscope machines, they were controlled with the help of two knobs located at each side, and the horizontal and vertical movement of the roto-board was controlled with the help of these knobs. There was yet another knob that used to control the speed that images would move across the board, slower speeds of which were denoted with ‘low’ whereas faster speed was denoted with ‘high’.
What is rotoscoping all about?
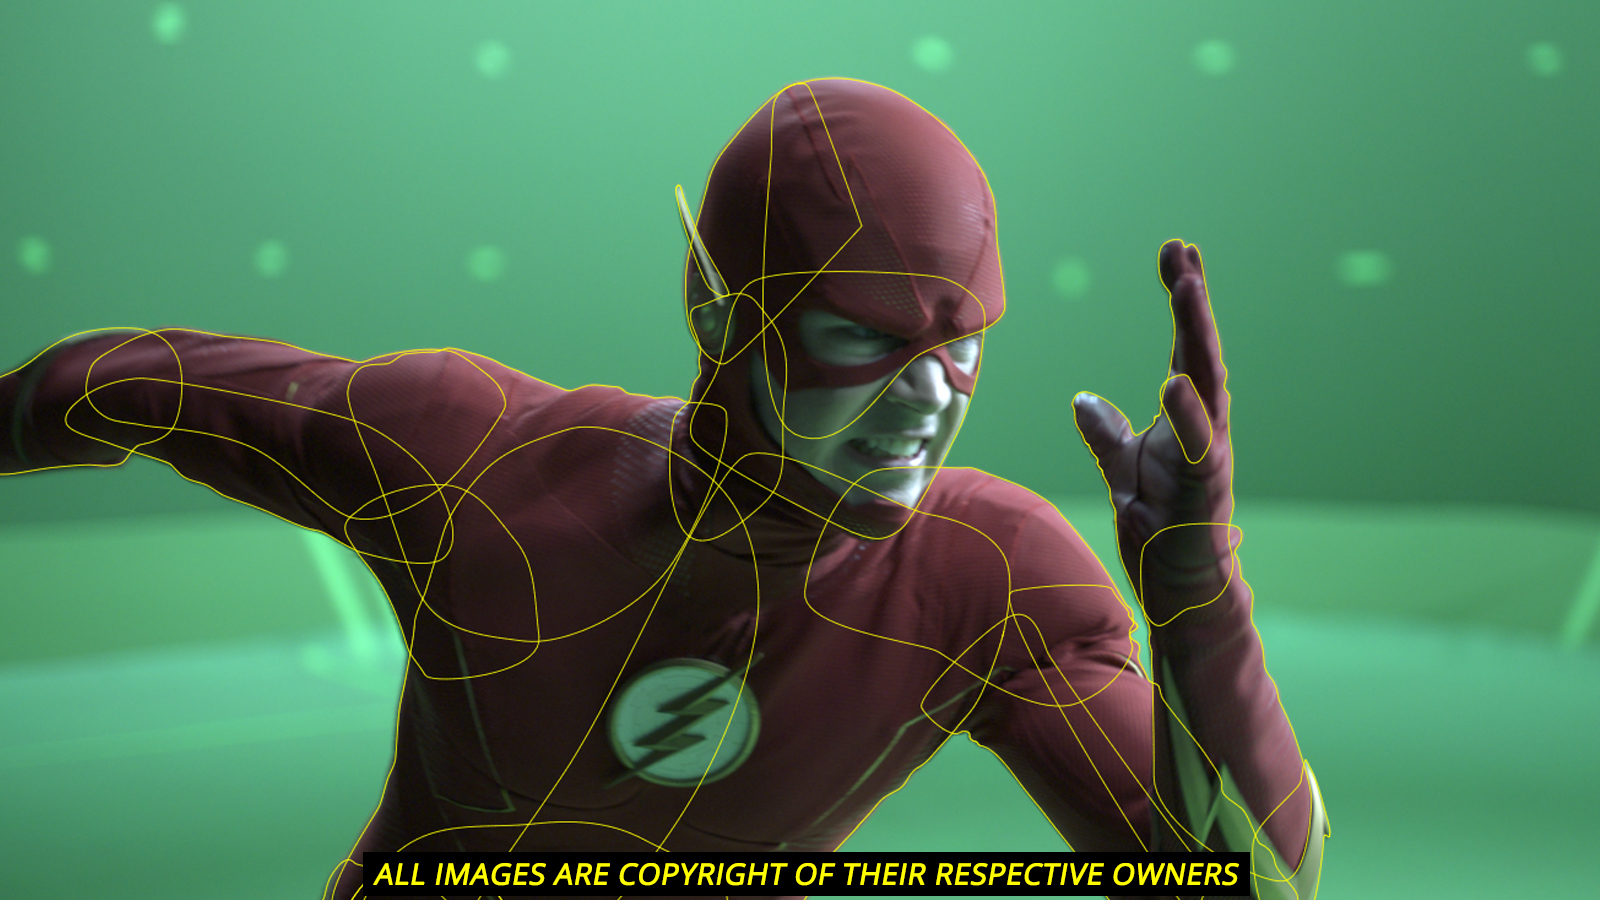
Here, the actual idea or plant is to shoot live-action footage of any given actor or character, trace over all the individual frames that are included in the footage, and also mark the essential features that will help in creating a reference for the animation of a character.
Keeping visual effects in mind, there applies the same process, but in a different manner. Also known as roto artist, rotoscoping artist makes use of a set of tools to trace an object and creates a whole new alpha channel for some specific areas of a video or image sequence. The specific elements of the shot can be extracted and they can be placed on a completely different background or they can change their color or work the way needed, the matte or alpha channel needs to be in place for the same.
According to the scope of the work as well as the complexities of the shot, rotoscoping can take a few hours or even days to complete.
Rotoscoping still has a pivotal role to play in VFX, the utilization of blue screens and green screens has surely proven to be helpful in speeding up the process of matte creation but it doesn’t work well for every attempt.
Let’s discuss some VFX rotoscoping software solutions
Check out some notable software solutions available out there.

Of course, the market is flooded with a wide range of software solutions that can help in VFX rotoscoping, not all of the have what one may expect from a solution or they don’t have robust spline tools packaged with it. One of the most flexible and versatile solutions should be the one that supports the export of roto splines across different compositing software. The prime focus of the solution needs to be on rotoscoping regardless of their support for a wide range of tasks. These are some amazing software solutions.
SilhouetteFX
SilhouetteFX has gained enormous popularity over the past few years and now it has become one of the most important solution in the VFX pipeline. The software has expanded itself amazingly, it includes capabilities facilitating paint, morphing, conversion from 2D to 3D, warping, and some alternative matting methods.
Mocha Pro
Studios around the world make use of this award-winning software for Planar Tracking, thanks to its powerful rotoscoping tools. The software solution is equipped with Stereoscopic workflow capabilities, and it is also capable of camera stabilization and object removal.
Some key tips to becoming a recognizable VFX rotoscopy artist.
Check out these amazing tips and you are sure to rock!
The best thing about roto is that it’s an art and there is no specific way of getting it done. But, if you want to make it shine, there are some basic rules that are needed to be followed. It takes some time for artists to develop speed and style, it’s all about the experience. Here, we have got you covered with some tips to improve the quality of roto and mattes, and you can create the ones that compositors will happily take forward.
Don’t forget to break the objects down into simple shapes.
If you are looking forward to creating some excellent mattes, you can’t avoid this rule, even if it feels like doing roto separately for each and every strand of hair. Pick one of the objects and make sure that you complete it to the end of its visibility in the shot, and now you can feel free to pick the other one.
Plan before you get started.
First, you need to have the right understanding of the object’s motion that you are expected to work on. You need to start from the position where the shape is properly visible and you can understand its form, even if it exists somewhere in the middle of the shot, to make a goal of having the least possible keyframes.
You need to make the edges consistent.
For any roto work you do, this can be a make-or-break point. For instance, if your spline is 1px in from the edge where you are starting, this needs to be the same throughout the shot. This will allow the compositor to control your matte with the help of erode or dilate tools mattes, given that it needs to be consistent. If this specific thing is not followed properly, the mattes are more likely to end up with jitters, and it may make the matte useless.
The points of your spline need to be at the same part.

At the beginning of the shot, if the vertex of your spline is at the elbow, this needs to stay right there throughout the shot and make sure it doesn’t move towards the wrist in the end. This needs to be followed properly, if not, it can make your shape appear boiling and can cause motion blur issues. If you see your shape changing drastically, then you have the freedom to turn off the existing shape and you can work on a new one.
Tracking data can be helpful
Whenever it is possible, you should make use of tracking data as SilhouetteFX comes with an amazing point tracking feature, and Mocha Pro is equipped with an award-winning planar tracking feature. You will end up with the least possible keyframes while these tools will do all the hard work for you.
A few more important points
- You must be aware of the importance of matte, once you start avoiding areas of frames that are not needed, you are sure to save a great deal of your precious time.
- You can speed up the process once you are aware of the keyboard shortcuts for all the applications that you use. Things can be easier as the same shortcuts can work on other similar applications that you may use.
- Always check your work with the help of a solid overlay view, you won’t need to keep looking at the splines, and you can come to know about the problems with your roto right away. Solving problems in the very beginning is always a smart choice instead of resolving them in the end.

